De-fishing the 7Artisans II 7.5mm f/2.8 (Micro Four Thirds) with ffmpeg
A one-command way to convert the heavy fisheye curvature from a 7Artisans 7.5mm Mark II f/2.8
(a APSC diagonal fisheye on MFT) into a natural-looking rectilinear image, using only
ffmpeg. No GUI, no plugins, no lens profile required.
The command
ffmpeg -i in.jpg -vf "v360=input=fisheye:output=flat:id_fov=142:d_fov=142:w=9216:h=6912:interp=lanczos,crop=6062:3648:(iw-ow)/2:(ih-oh)/2" out.png
That’s it. Swap in.jpg / out.png for your filenames.
Background
The 7.5mm is sold as a ~190° fisheye, but that figure is the diagonal angle measured in the lens’s own fisheye projection — feed it to a rectilinear remap directly and it badly over-corrects. What you actually want is the effective diagonal field of view of the frame, which for this lens/body lands around 142° once tuned (see Calibrating below).
ffmpeg’s v360 filter reads the frame as a
fisheye projection and re-projects it to flat (rectilinear / gnomonic) — the “normal lens”
projection in which straight lines stay straight.
The pipeline, step by step
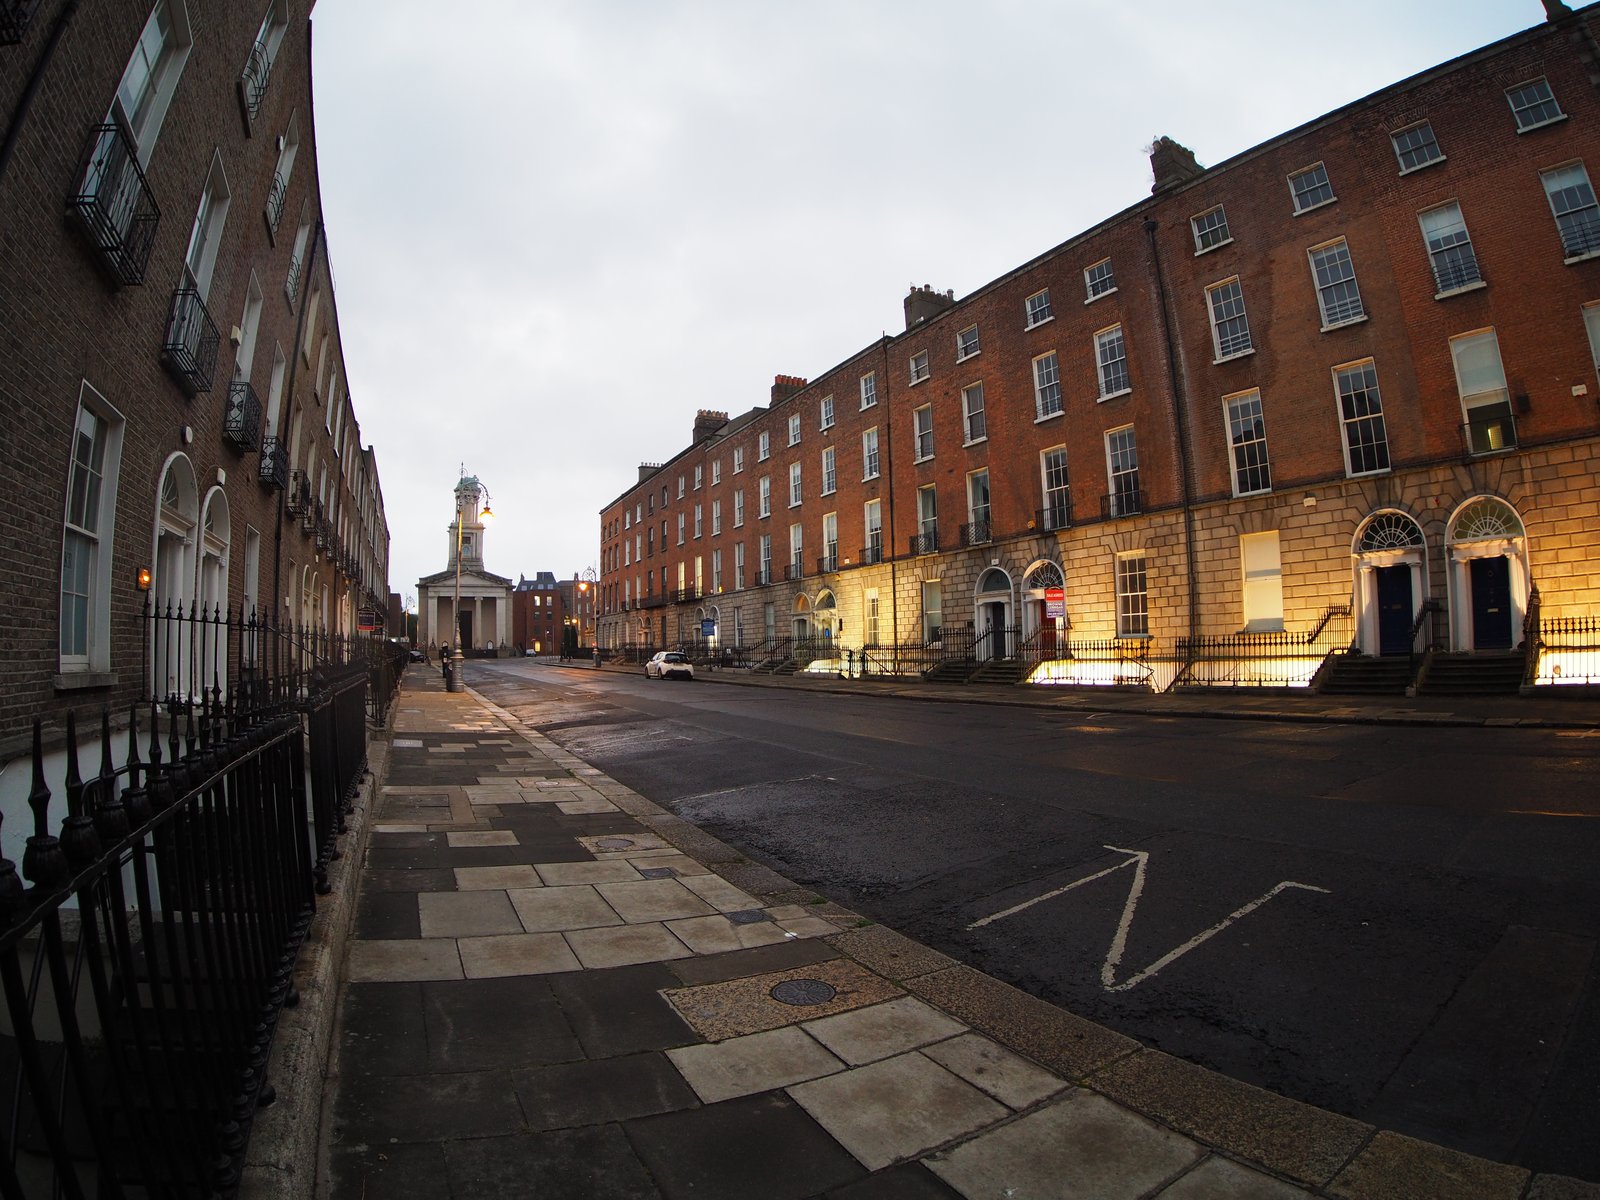
1. Fisheye original (straight out of camera)
Note the bowed rooflines and the curved iron railings.
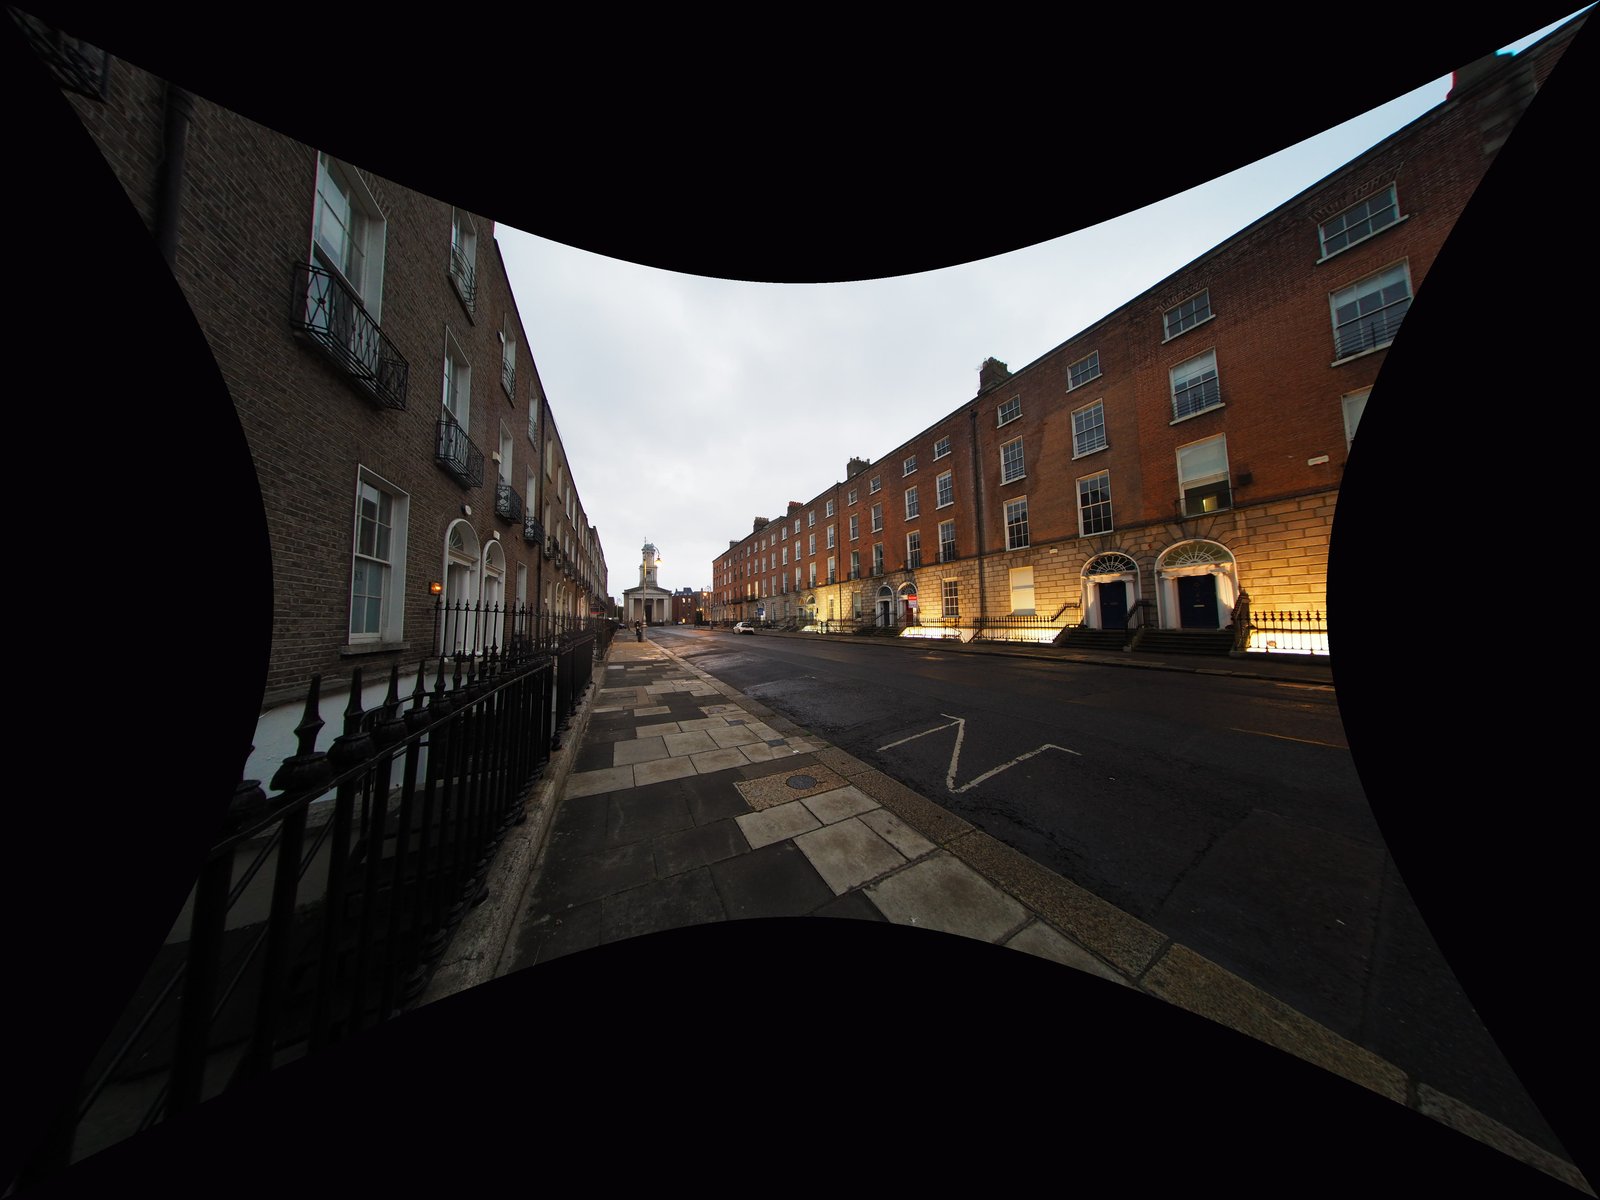
2. After v360 remap, before cropping
The projection is now rectilinear — lines are straight — but mapping a curved frame onto a flat one leaves empty black wedges at the edges where no pixels exist.
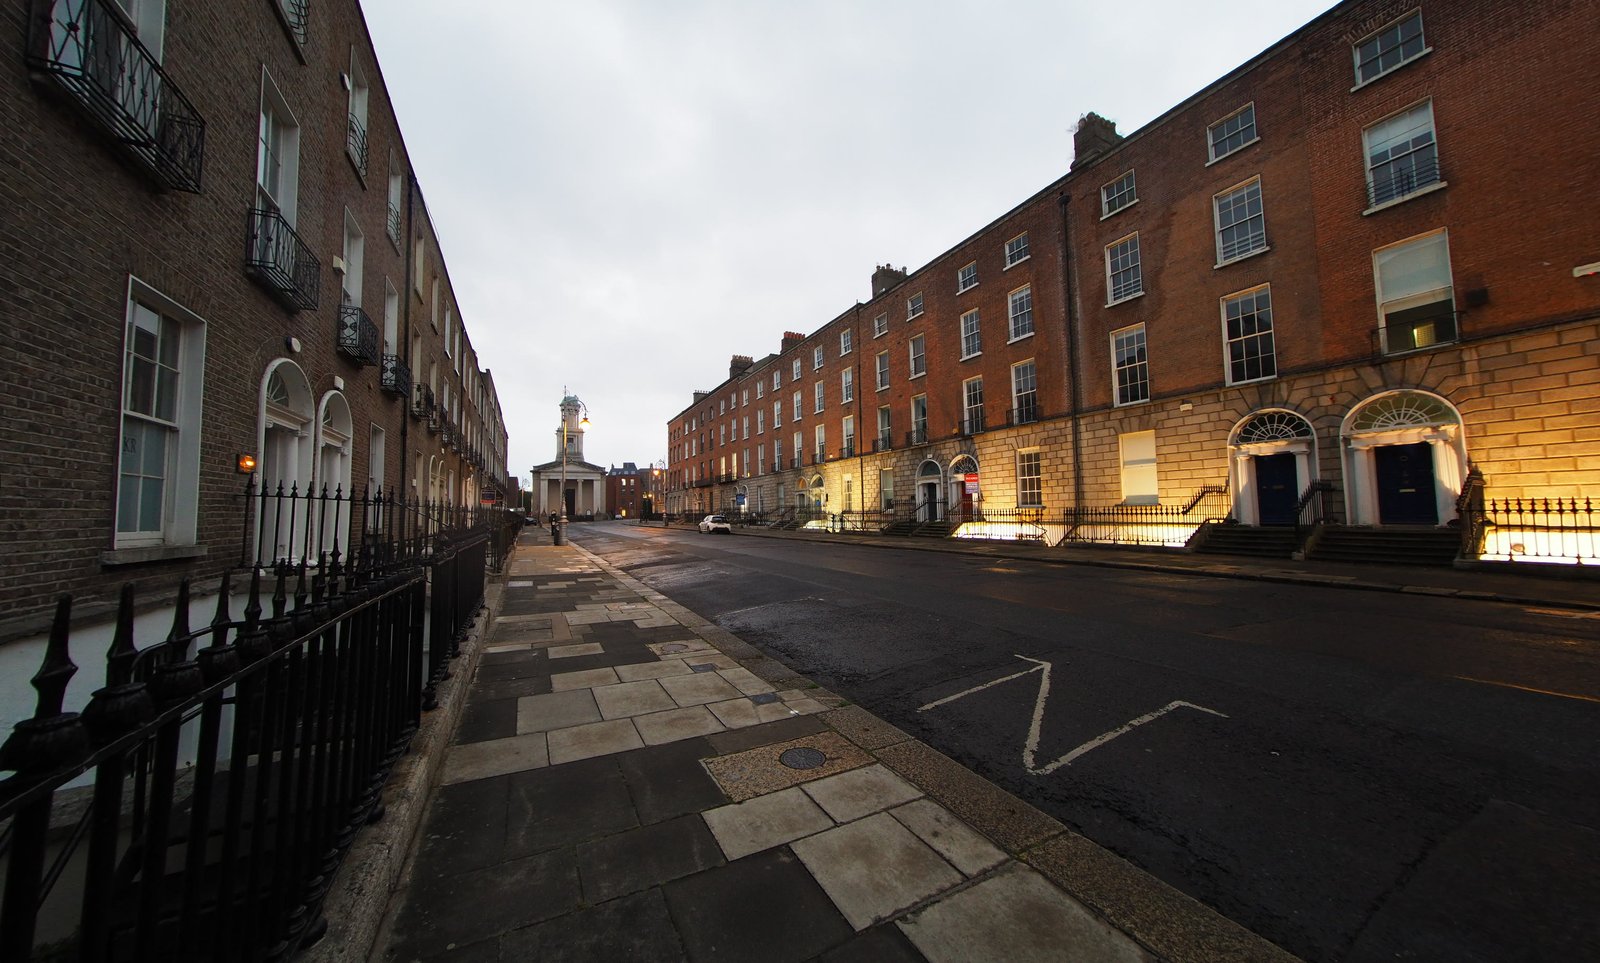
3. After the centered crop
The crop filter trims those wedges away, leaving a clean rectangle.
What each parameter does
| Parameter | Value | Meaning |
|---|---|---|
input=fisheye |
— | Treat the source as a fisheye projection. |
output=flat |
— | Re-project to rectilinear (straight lines stay straight). |
id_fov |
142 |
Input diagonal FOV of the lens, in degrees. The key correctness knob. |
d_fov |
142 |
Output diagonal FOV — framing/zoom. Set equal to id_fov to keep all captured content. |
w / h |
9216 / 6912 |
Output resolution (here 2× the 4608×3456 source). |
interp |
lanczos |
Interpolation quality. Default is bilinear (softer). |
crop=W:H:X:Y |
6062:3648:(iw-ow)/2:(ih-oh)/2 |
Removes the black wedges. The expressions auto-center the crop. |
Correctness vs. framing — keep these separate
id_fovdecides whether lines come out straight. It describes the lens. Get it wrong and nothing else fixes it. Over-corrected (edges pushed out, stretched) →id_fovtoo high. Under-corrected (still bowed) → too low.d_fovandcropdecide what you see. They don’t affect correctness. Keepingd_fovequal toid_fovpreserves the full captured frame, thencropreclaims a rectangle from it.
Removing the black corners
The crop filter runs last in the chain. The expression form auto-centers, so you only set the
output rectangle:
crop=6062:3648:(iw-ow)/2:(ih-oh)/2
Here iw/ih are the incoming (post-remap) dimensions and ow/oh are the width/height you
set — (iw-ow)/2:(ih-oh)/2 always centers. crop is a pure pixel cut: no resampling, no
quality loss. To find your own W:H, render once without the crop, read the largest clean
rectangle off the result in any image viewer, and plug those numbers in.
Quality notes
interp=lanczosis the cheapest quality win over the bilinear default.spline16is a slightly softer alternative that rings less on high-contrast edges.- Feed it the best source. If you shoot raw, develop to a 16-bit TIFF and run that through ffmpeg rather than a camera JPEG. Out-of-camera JPEGs are a hard ceiling.
- Don’t re-compress at the end. PNG/TIFF output is lossless. For JPEG, use
-q:v 2. -
Supersampling (render at 2× then downscale with lanczos) further reduces edge aliasing. The
w=9216:h=6912above is already 2× the source; add a trailingscaleif you want to deliver at native size:...interp=lanczos,crop=6062:3648:(iw-ow)/2:(ih-oh)/2,scale=3031:1824:flags=lanczos
Calibrating for your setup
Lens sample variation and how you read FOV mean your ideal id_fov may differ slightly.
- Shoot something with strong straight lines near the frame edges (a building, a doorway).
- Start from
id_fov=142(withd_fovequal to it). - If edges are still bowed, raise
id_fov; if over-corrected/stretched, lower it. Adjust in ~1° steps. - Once lines are straight, set
croppurely for framing.
Lens: 7Artisans II 7.5mm f/2.8 · Body: Olympus E-M10II (4:3) · Tool: ffmpeg v360 filter.
Example image: Dublin Georgian terrace.